Introduction
One of the most tedious things to do when building a Java web application is to handle the so called bindings.
But what is a binding? I’m going to give you an example to understand what I mean.
Let’s suppose we have a web application whose back-end is written in Java while the front-end is HTML/JavaScript based. The communication between the two sides is done using JSON.
Suppose we have a Java model that looks like:
class Book {
   private name;
   private publishingDate;
   private Author author;
   //...setters/getters here
}
An instance of the above class gets JSON serialized, then lands to the client side (the web browser) and gets deserialized into a JavaScript object, that looks like:
{name: "Alice in Wonderland", publishingDate: "26 November 1865",
 author : {name: "Lewis Carroll", address: {town:"Guildford", country: "England"}}}
The relationship between the Java model and the resulting JavaScript model is called binding.
JavaScript allows the use of path expressions to refer the object’s fields, for example: publishingDate, author, author.name, author.address.town
Writing these path expressions requires some copy/paste operations if you don’t have a good memory, or, if you are using Eclipse IDE, a plugin can insert them automatically.
The JavaBean Inspector Eclipse plugin
This Eclipse plugin is open sourced and can be installed from here
To install it, you can use Help -> Eclipse Marketplace menu.
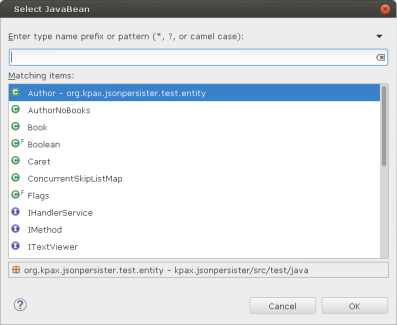
After installing, press Ctrl+Alt+8 to select the JavaBean type. You’ll see something like:
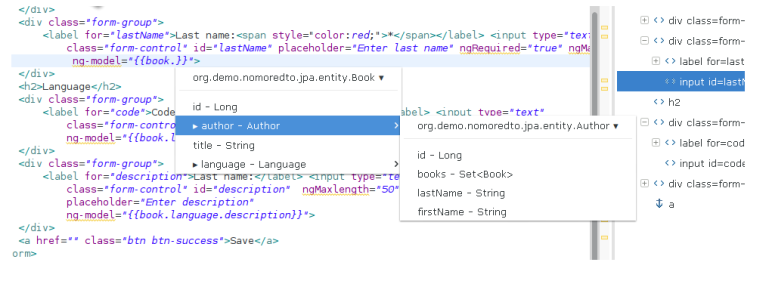
Search and select the JavaBean type you want to introspect. Press OK button then open (if not already opened) in Eclipse editor the file you work on, place the caret where you want to insert the path expression, then press Ctrl+Alt+Space. You’ll see something like:
Navigate to the end of the desired path expression and select it. The selected path will be inserted at caret location. That’s it.
One more thing that you can do is to validate a path expression against the selected JavaBean type. Just select the path to validate and press Ctrl+Alt+9. If it’s valid, you’ll see a message like:
Any suggestions for improvement are welcomed, so feel free to add comments.


